Pass partition definition for heat exchangers
Starting from the 2020 version of the program, the pass partitions can be defined as physical components connected to the exchanger channels. The thickness can also be verified according to TEMA RCB if a TEMA category has been defined for the exchanger.
Method 1: Automatic using the heat exchanger wizard
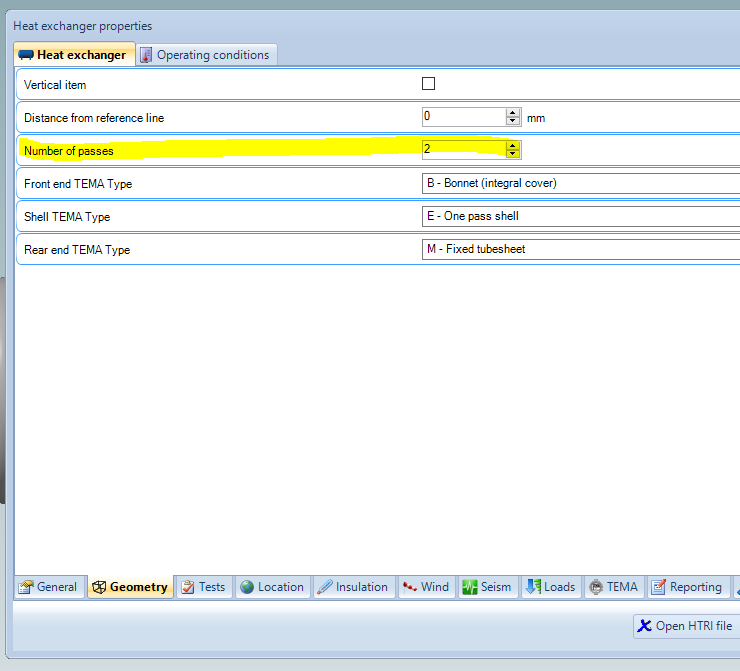
The insertion takes place automatically when using the exchanger wizard, in this case it is essential to first set the number of passes correctly in the geometric properties of the item, as shown in the figure. In fact, the number of passes influences the possible configurations for the pass partitions.
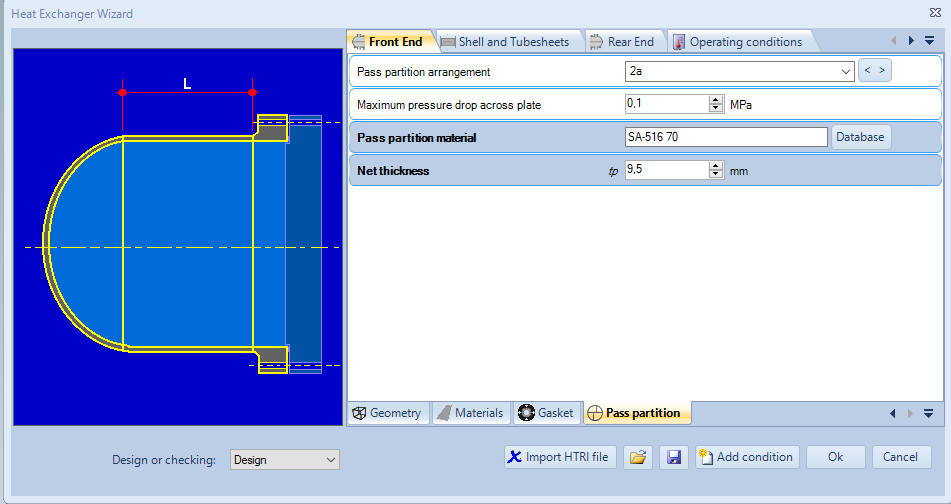
Once the number of passes has been set, the wizard can run, note that there will be a new "Pass partition" tab for each channel. The values selectable in the first row depend, as explained above, on the number of passes set.
Enter here the geometric properties and the material of the pass partition.
Once the wizard has run, the required exchanger will be generated, note the presence of the pass partition as a selectable component in the 3D view and in the list of components.
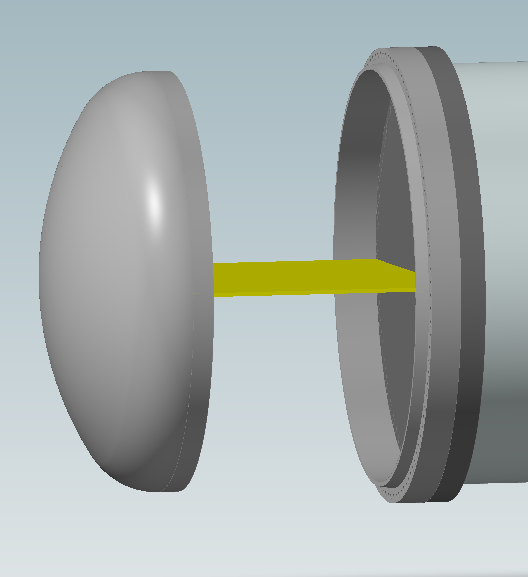
It is therefore possible to double click on the pass partition to define further properties such as the gasket coefficients, or to modify the geometric values calculated automatically.
Metodo 2: Manual addition
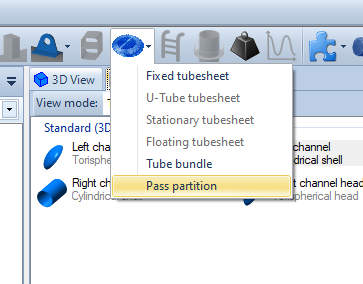
It is also possible to manually add the pass partition to the channel of an existing exchanger, to do this select the channel and then enable the "Desktop View" mode.
The icon of the exchanger components menu will appear, from which the "Pass partition" type can be selected. The usual component form will appear in which all the properties can be inserted.
Metodo 3: Gasket properties only
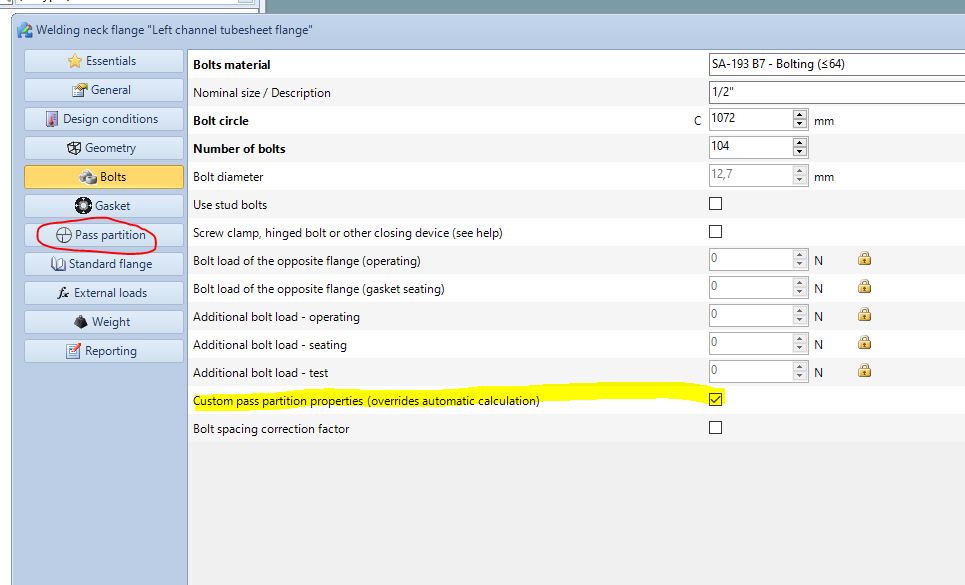
If you do not want to create the pass partitions as components of the exchanger, it is also possible to add to the channel flanges the additional bolt loads to seat the pass partition gasket. This method corresponds to the management of pass partitions in versions prior to 2020.
To define the additional load it is necessary to activate the property shown in the figure, a new "Pass partition" tab will appear in which it will be possible to insert the gasket data.
News archive
- Jul 21, 2022: Importing HTRI files
- Apr 24, 2020: Expansion joints
- Mar 02, 2020: Pass partition definition for heat exchangers
- Nov 15, 2018: How to design an air cooler heat exchanger with NextGen
- Sep 03, 2014: Heat Exchanger Wizard